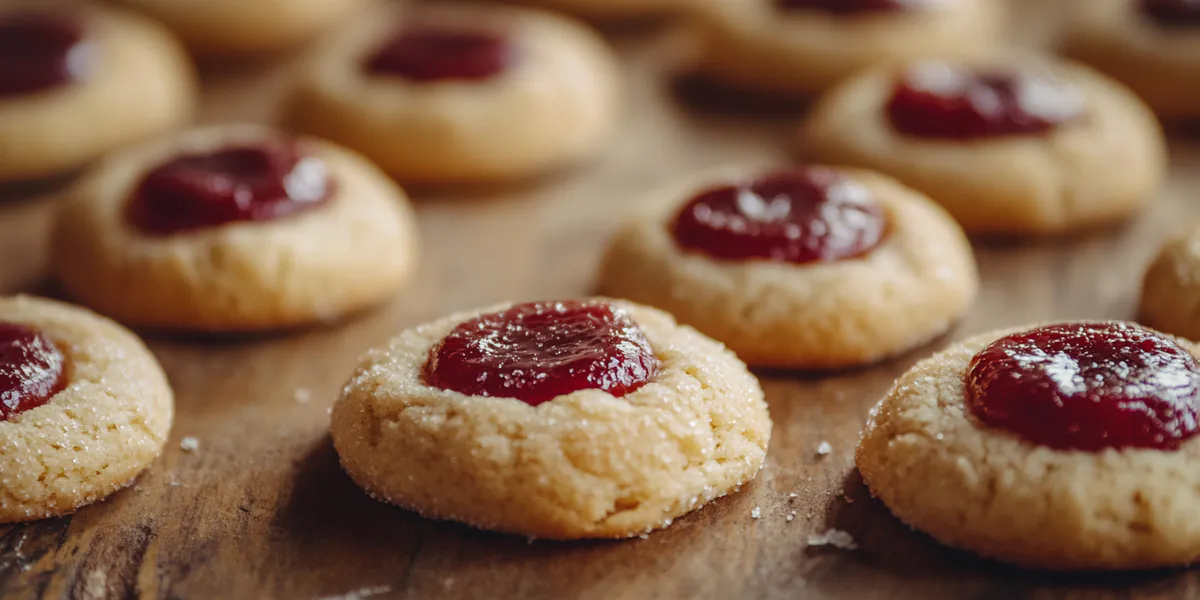
A chilly winter afternoon, the kind where you just want to snuggle up with a cozy blanket. The scent of freshly baked cookies drifts through your kitchen, wrapping you in warmth. There’s something truly magical about a homemade cookie, isn’t there? Today, we’re diving into the heartwarming world of the easy thumbprint cookies recipe. This guide is your trusty companion, taking you step-by-step through creating these delightful little treats. With their buttery goodness and sweet jam-filled centers, thumbprint cookies are a timeless classic that brings a smile to any occasion. Whether you’re a seasoned baker or just starting out, this recipe is as foolproof as it is delicious.
In this guide, you’ll find everything you need, from ingredients and tools to step-by-step instructions and tips to dodge those pesky baking mishaps. Thumbprint cookies are adored for their simplicity and versatility, making them perfect for holiday gatherings, a cozy afternoon tea, or just a sweet indulgence at home. So, let’s roll up our sleeves and embark on this baking journey together. You’ll soon see why these cookies are a must-have in your baking repertoire.
Table of Contents
Why These Cookies Rock
Thumbprint cookies are more than just a sweet treat; they’re a delightful blend of flavor, texture, and nostalgia. Here’s why you’ll fall head over heels for this easy thumbprint cookies recipe and why it should be your go-to for any occasion:
- Allergy-Friendly Options: You can easily tweak the recipe to fit various dietary needs. Try almond flour for a gluten-free version or coconut sugar for a lower glycemic alternative.
- Perfect for Any Occasion: These cookies are a hit at holiday cookie exchanges, birthday parties, or as a homemade gift. Their charming appearance makes them a star at any gathering.
- Feel-Good Baking: There’s something therapeutic about baking thumbprint cookies. Rolling the dough and pressing your thumb into each cookie brings a sense of satisfaction and warmth.
The easy thumbprint cookies recipe is a beautiful mix of simplicity and flavor, making it a favorite for both seasoned bakers and beginners. Whether you’re sharing them with loved ones or enjoying them with a cup of tea, these cookies are sure to bring a smile to your face.
What You’ll Need (Ingredients + Tools)
Gathering the right ingredients and tools is the first step to ensuring your baking experience is smooth and enjoyable. Here’s what you’ll need for this easy thumbprint cookies recipe:

Ingredients:
- 1 cup (2 sticks) unsalted butter, softened
- 2/3 cup granulated sugar
- 2 large egg yolks
- 1 teaspoon vanilla extract
- 2 cups all-purpose flour
- 1/4 teaspoon salt
- 1/2 cup fruit jam or preserve of your choice
Optional Substitutions:
- Use almond flour for a gluten-free option.
- Replace granulated sugar with coconut sugar for a healthier touch.
- Experiment with different jams like raspberry, apricot, or fig for unique flavors.
Tools:
- Mixing bowls
- Electric mixer or hand whisk
- Baking sheet
- Parchment paper or silicone baking mat
- Teaspoon or small cookie scoop
For the best results, use high-quality ingredients. You can find organic butter and freshly made jams at local farmers’ markets or specialty grocery stores. These small touches can elevate your cookies to new heights.
How to Make Them (Step-by-Step)
Now that you’ve gathered all your ingredients and tools, it’s time to dive into the process of making these delightful cookies. Follow this step-by-step guide for the easy thumbprint cookies recipe:

Step 1: Prep Your Ingredients
Before you start, ensure your butter is softened to room temperature. This makes it easier to cream with sugar. Preheat your oven to 350°F (175°C) and line your baking sheet with parchment paper or a silicone mat.
Step 2: Cream the Butter and Sugar
In a large mixing bowl, combine the softened butter and granulated sugar. Use an electric mixer or whisk to beat the mixture until light and fluffy. This should take about 3-5 minutes. The creamed mixture should be pale in color and have a smooth texture.
Step 3: Add the Egg Yolks and Vanilla
Mix in the egg yolks one at a time, ensuring each yolk is fully incorporated before adding the next. Add the vanilla extract and continue to beat until the mixture is smooth and well-combined.
Step 4: Incorporate the Dry Ingredients
In a separate bowl, whisk together the all-purpose flour and salt. Gradually add the dry ingredients to the wet mixture, mixing until just combined. Avoid overmixing, as this can result in tough cookies. The dough should be soft and slightly sticky.
Step 5: Shape the Cookies
Using a teaspoon or small cookie scoop, portion the dough into small balls (about 1 inch in diameter) and place them on the prepared baking sheet. Gently press your thumb into the center of each ball to create an indentation. This is where the jam will go, so make sure the indent is deep enough but not all the way through the cookie.
Step 6: Fill with Jam
Spoon a small amount of your chosen jam into each indentation. Be careful not to overfill, as the jam can bubble over during baking.
Step 7: Bake to Perfection

Place the cookies in the preheated oven and bake for 12-15 minutes, or until the edges are golden brown and the jam is bubbling. The centers should remain soft. Allow the cookies to cool on the baking sheet for a few minutes before transferring them to a wire rack to cool completely.
And there you have it! You’ve successfully made a batch of delicious thumbprint cookies. Feel free to taste the dough along the way (I always do—don’t judge!) and adjust the flavors as you like.

Troubleshooting & Common Mistakes
Baking can sometimes be unpredictable, but don’t worry. Here are some common issues you might encounter and how to fix them:
Dry or Crumbly Cookies
If your cookies turn out dry or crumbly, it might be due to overmixing the dough or using too much flour. Make sure to measure your ingredients accurately and mix just until combined.
Cookies Spreading Too Much
When cookies spread too much, it could be because the dough was too warm. Try chilling the dough for 30 minutes before baking to help it hold its shape.
Fixes for Mid-Bake
If you notice your cookies aren’t turning out as expected, don’t panic. You can gently reshape them with a spoon while they’re still warm or adjust the next batch by tweaking the temperature or baking time.
Pro Tips to Make Them Even Better
Elevate your easy thumbprint cookies recipe with these pro tips:
- Chill the Dough: For enhanced flavor and texture, chill the dough for at least 30 minutes before shaping and baking.
- Swap Sweeteners: Experiment with maple syrup instead of sugar for a unique taste profile.
- Use Browned Butter: For a nutty, rich flavor, try browning the butter before using it in the recipe.
- Sprinkle Sea Salt: A light sprinkle of sea salt on the finished cookies enhances the sweetness and adds depth of flavor.
These insider tips are sure to make your thumbprint cookies even more irresistible and memorable.
Fun Variations to Try
One of the joys of baking is experimenting with flavors and ingredients. Here are some fun variations for your easy thumbprint cookies recipe:
Flavor Variations:
- Coconut: Add shredded coconut to the dough for a tropical twist.
- Lemon Zest: Incorporate lemon zest into the dough for a bright, citrusy flavor.
- Peanut Butter Swirls: Mix a swirl of peanut butter into the jam for a nutty delight.
Add-ins:
- Nuts: Press a whole almond or pecan into the center along with the jam.
- Dried Fruit: Mix in chopped dried apricots or cranberries for added texture.
- Chocolate Chunks: Add small chocolate chunks to the dough for a rich, decadent version.
These variations allow you to customize your cookies to suit any occasion or preference, making them a versatile addition to your baking repertoire.
How to Store Them
Proper storage is key to keeping your cookies fresh and delicious. Here’s how to store your easy thumbprint cookies recipe:
- Airtight Containers: Store cookies in an airtight container at room temperature for up to one week.
- Freezing: For longer storage, freeze the cookies in a single layer on a baking sheet, then transfer to a freezer-safe bag or container. They can be frozen for up to three months.
- Reheating: To enjoy warm cookies, reheat them in the oven at 300°F (150°C) for about 5 minutes or in the microwave for a few seconds.
This way, you can savor your cookies over time, perfect for pairing with your morning coffee or an afternoon tea break.
Frequently Asked Questions
What is the best jam to use for thumbprint cookies?
You can use any fruit jam or preserve you like. Popular choices include raspberry, apricot, and fig.
Can I make thumbprint cookies gluten-free?
Yes, you can substitute all-purpose flour with almond flour for a gluten-free version.
How do I prevent my cookies from spreading too much?
Chill the dough for 30 minutes before baking to help the cookies hold their shape.
How long can I store thumbprint cookies?
Store them in an airtight container at room temperature for up to one week or freeze for up to three months.
Can I use different sweeteners in the recipe?
Yes, you can experiment with coconut sugar or maple syrup for a unique taste.
Cozy Wrap-Up
Reflecting on the joys of baking, this easy thumbprint cookies recipe stands out for its simplicity, versatility, and delightful flavor. Whether you’re new to baking or a seasoned pro, these cookies offer a comforting, homemade touch that’s hard to resist.
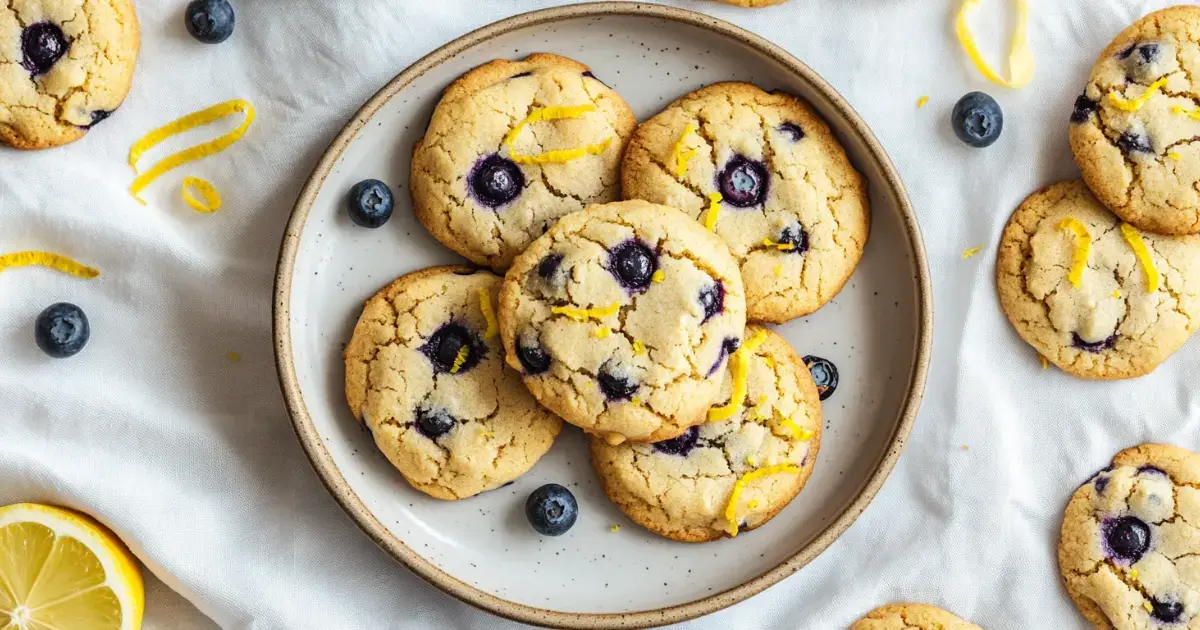
As you enjoy your freshly baked cookies, consider trying out other delightful recipes like the Lemon Shortbread Cookies or the Peanut Butter Cookies for even more baking fun.
I invite you to share your baking adventures and results with friends and family. Who knows? Your kitchen might become the new favorite spot for delicious homemade treats! For even more creative cookie inspiration, check out this classic thumbprint cookie guide from Sally’s Baking Addiction—a trusted resource loved by home bakers.
Happy baking, and may your days be filled with the warmth and joy of a freshly baked cookie.
Print
Easy Thumbprint Cookies
A simple and delicious thumbprint cookie recipe that’s perfect for any occasion.
- Total Time: 30 minutes
- Yield: 24 cookies
Ingredients
Main Ingredients:
1 cup (2 sticks) unsalted butter, softened
2/3 cup granulated sugar
2 large egg yolks
1 teaspoon vanilla extract
2 cups all-purpose flour
1/4 teaspoon salt
1/2 cup fruit jam or preserve of your choice
Instructions
Preparation Steps:
1. Preheat oven to 350°F (175°C) and line a baking sheet with parchment paper.
2. Cream butter and sugar until light and fluffy.
3. Add egg yolks and vanilla, mixing well.
4. Gradually add flour and salt, mixing until just combined.
5. Shape dough into balls, press thumb into center, and fill with jam.
6. Bake for 12-15 minutes until edges are golden.
Notes
For best results, use high-quality ingredients and experiment with different jams for unique flavors.
- Prep Time: 15 minutes
- Cook Time: 15 minutes
- Category: Quick & Easy Cookies
- Method: Baking
- Cuisine: American
- Diet: Vegetarian
Nutrition
- Serving Size: 1 cookie
- Calories: 100
- Sugar: 6g
- Sodium: 20mg
- Fat: 6g
- Saturated Fat: 4g
- Unsaturated Fat: 2g
- Trans Fat: 0g
- Carbohydrates: 10g
- Fiber: 0g
- Protein: 1g
- Cholesterol: 20mg
Keywords: easy thumbprint cookies recipe, jam-filled cookies, buttery cookies